
1
Undo
To undo the last action made for the current project. The maximum number of actions you can undo can be set in the Preference panel. It is also limited by the amount of space on your hard disk.
2
Redo
To redo the last action.
The control bar is used to undo/redo actions, manipulate the view of the camera and the objects' position and rotation, align objects to the terrain, render the current view into an image and to enter full screen mode. You can find the Control Bar on the top of the 3D viewer.
|
|
||
|
1 |
Undo |
To undo the last action made for the current project. The maximum number of actions you can undo can be set in the Preference panel. It is also limited by the amount of space on your hard disk. |
|
2 |
Redo |
To redo the last action. |

|
||
|
1 |
Home |
To snap the camera to a 45 degree perspective to the selected object. |
|
2 |
Zoom |
To zoom in and out of the scene. |
|
3 |
Pan |
To pan the camera. |
|
4 |
Orbit/Roll |
To rotate the camera. Click its down arrow to switch to Rotate or Roll mode. |
|
5 |
Camera View |
To switch the camera to different view, click the down arrow and choose from Front, Right, Top, Left, Bottom, Back, Face or All. |
|
6 |
Center |
Click this button so the camera snaps to view the selected object in the current project. |
|
7 |
Mini View Port |
Click this button to show the Mini View Port. Please refer to the Camera and Mini View Port section for more information. |
|
8 |
Walk/Fly |
Switch the camera into Walk or Fly mode. You can then move the camera in game-like fashion by using the W.A.S.D., or other specified keys on your keyboard. If you want to switch back to the normal camera mode, press ESC key. |

|
||
|
1 |
Select Object |
Toggles the Select mode. You may then directly pick the object in the 3D viewer. You may also drag a rectangle around multiple objects to select them in this Mode. Drag from left to right: Any object partially contacting the rectangle will be selected. 
Drag from right to left: Only the objects covered entirely within the rectangle will be selected. 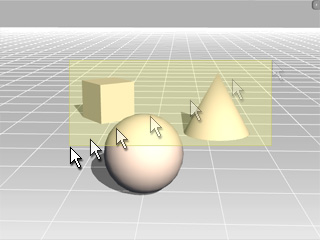
|
|
2 |
Move Object |
To switch to Move mode. You may then directly move the selected object in the 3D viewer instead of manually entering the values on the Modify page.
Left Mouse Button: Move object along X-/Y-axis. |
|
3 |
Rotate Object |
To switch to Rotate mode. You may then directly rotate the selected object in the 3D viewer instead of manually entering the values on the Modify page.
Left Mouse Button: Rotate on local Z axis. |
|
4 |
Scale Object |
To switch to Scale mode. You may then directly scale the selected object in the 3D viewer instead of manually entering the values on the Modify page.
Left Mouse Button: Uniformly scale object. |
|
In Move Object, Rotate Object or
Scale Object modes, you may also: |
||
|
5 |
Align Objects |
Multi-select objects and align them with this button. Please refer to the Aligning Objects section for more information. |
|
6 |
Multi_Duplicate |
Click this button to duplicate your currently selected object; it can be a prop or an accessory. Please refer to the Duplicating Props section for more information. |
|
7 |
Align to Terrain |
Click this button so the selected objects will always be moved along the terrain, if present. If you switch to Snap to Terrain or Follow Terrain modes, movement is constrained to the ground and will follow the contours of the terrain as you move. You must select Off to cancel the constrain. |

|
||
|
1 |
Preview |
To render the current view of the 3D viewer into an image. You may then save this image afterwards. |
|
2 |
Full Screen |
To enter full screen mode. |

|
||
|
1 |
Physics Settings |
Click this button to show the Physcis Settings panel for further physics settings. Please refer to the Physics Concepts section for more information. |
|
2 |
Rigid Body Simulation |
Click this button to turn on the Rigid Body Simulation mode. All the rigid bodies start their physics animation when you play the project. Please refer to the The Basics of Rigid Body Simulation section for more information. |
|
3 |
Soft Body Simulation |
Click this button to turn on the Soft Body Simulation mode. All the soft bodies start their physics animation when you play the project. Please refer to the The Basics of Soft Body Simulation section for more information. |