Camera and the Mini View Port (New for 5)
In addition to the 3D Preview Window, you may sometimes need another view port to see another view at the same time.
IClone provides
the Mini View Port feature to display another mini window on the main preview window, so that you may see two different views at the same time.
The Mini View Port turns iClone into a professional photography and film studio. You may then use it to observe your subjects between preview and custom camera mode.
-
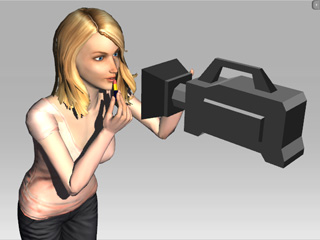
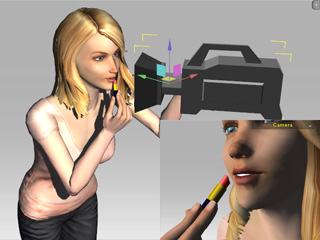
Prepare a project. Add a new custom camera and adjust its angle.
-
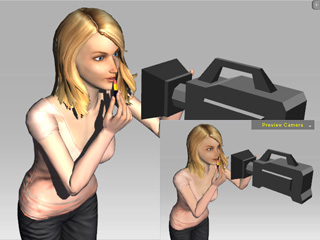
Press down the Mini View Port
 button (Shortcut: F8) on the Tool bar.
The Mini View Port panel appears.
button (Shortcut: F8) on the Tool bar.
The Mini View Port panel appears.

-
The Mini View Port also shows, by default, at the right-bottom of the main preview window.
-
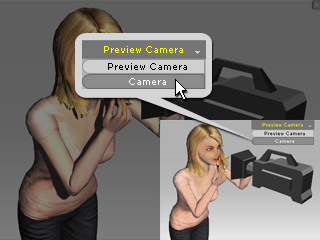
Click the camera selector so that the camera's view shows on the mini view port.
|
|
|
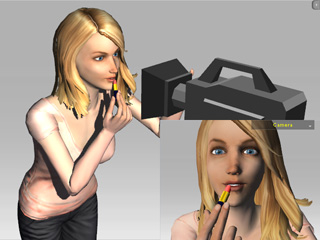
Use the Camera Selector to switch the view to the custom camera.
|
The Mini View Port is switched to the perspective of the custom camera.
|
-
If you move the custom camera, then the view in the Mini View Port will auto-update.
-
You may also select LT, LB or RB to decide the
position of the mini view port, or drag the slider to change the size of it.
-
Press up the Mini View Port button again to close the view port.
|
Note:
|
-
The Mini View Port is always in Quick Shading mode; the Bump, Glow
Reflection, Refraction and HDR effects can not be shown on this view port.
-
Any material key animations do not take effect in the Mini View Port.
-
It is for displaying the 3D scene; you can not pick any target in this port.
|