Workflows - Daz 3D
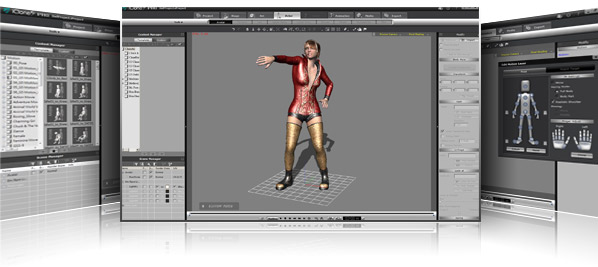
Here 3D animators can learn all the step-by-step procedures to make iClone work seamlessly with their favorite 3D application. Follow these illustrated guides to streamline your workflows.
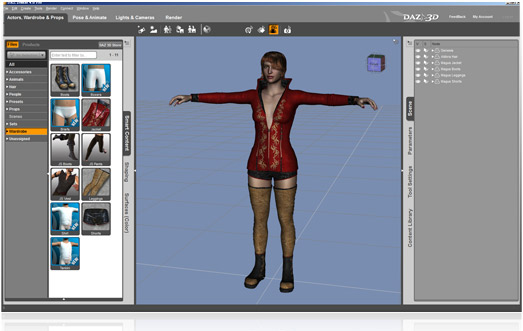
In Daz Studio4, you are suggested to generate Genesis characters. It's a real-time engine friendly design. The base character only takes 3,700 polygon face, and can be morphed to any body shape with perfect cloth compliance. 3DXchange5 provides the preset template for auto bone mapping. For other Daz character standard rig like V4 or M4, you may still use the characterize panel to do manually bone mapping.Â
Note
Please specify the appropriate maximum texture size before exporting DAZ FBX to iClone iAvatar. Some DAZ characters come with extremely large (4Kx4K) texture images, which might take a lot of video memory and slow down your computer. To ensure you have an optimized character for real-time rendering and visual display, you may resize selected textures from the texture link folder. For Genesis standard characters, 1024 x 1024 for each texture image is sufficient for a good visual presentation. Optionally, you may apply higher resolution textures to your character after conversion. We also suggest that you embed textures in the iAvatar file, which you can easily share on different computers without "path not found" issues. We suggest that you use 512x512 images for eyes, and 1024x1024 images for the rest of body parts.
To optimize high-polygon characters for iClone real-time animation, you are suggested to use the following tools:
a. Decimator: to decrease the polygon amounts on selected meshes
b. Texture Atlas: to reduce size, reassign UV maps, or merge textures
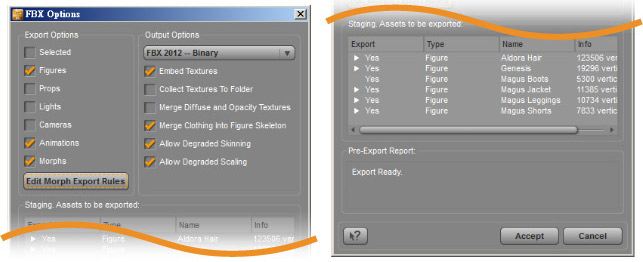
a. Export Options: Select "Figure", "Morph" and "Animation" (if animation is embedded)
b. Output Options: Select "FBX 2012 - Binary", and enable "Merge Clothing into Figure Skeleton", "Allow Degraded Skinning" and "Allow Degraded Scaling".
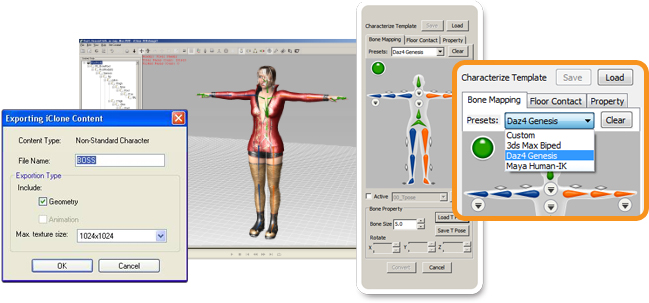
Import the FBX file and convert it to a "Non-standard character". For characterization, select the DAZ Genesis preset for auto bone mapping, load the preset DAZ 4 Genesis_FBX T-pose setting, and adjust for posture alignment.
Click “Convert†and export the iAvatar file (enable "Geometry") to the iClone Content Manager.
Go to "Actor" >> "Avatar". Find the character in the Custom folder you just exported from 3DXchange5.