Custom Bone-Mapping Method
In the Bone Mapping tab of the characterization procedure, you need to
map at least 15 bones of the custom character to the Reallusion Bone Structure.
If the character contains fingers, neck or spine bones, then you may need to go to the advanced mode for
mapping these bones.
This section covers the manual mapping method for characters from unknown 3D tools (unknown source). If you
already know the source 3D tool from where this character was created, then you can use the
mapping presets for quick mapping. Please refer to the
Auto Bone-Mapping Method section for more
information.
Also refer to the
About the Convert to Non-Standard Character Mode section for more information about the concept of mapping bones.
Mapping Bones - Basic Mode
-
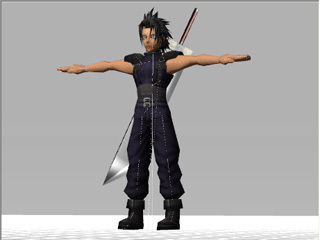
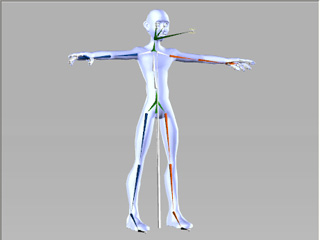
Please make sure that your character is set with a T-pose.
-
Click to highlight a dummy bone in the Modify panel.
-
Pick in the 3D Viewer or the Scene Tree to select a custom bone
to be governed by the bone of the dummy. This step maps the Reallusion Bone and the custom bone
together so that they will move together later on.
|
Note:
|
-
If you select the wrong bone, simply right-click on the bone of the dummy to break the relationship.
-
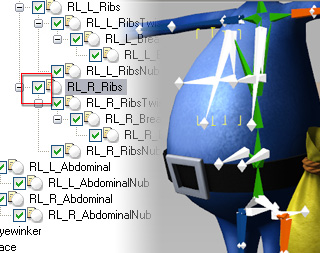
You can now hide redundant bones and save the show/hide information when the character is converted
to iAvatar format by deactivating the checkboxes of each individual bone.
|
|
|
Select the bone and deactivate its show/hide box in the Scene Tree.
|
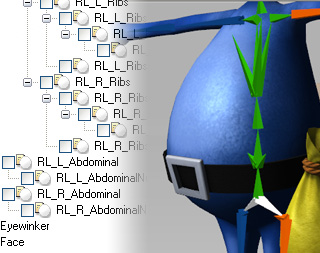
The bone structure is clearer after redundant bones are hidden.
|
-
Activating or deactivating the box with the Ctrl key pressed will
cause the entire hierarchy under that node to be simultaneously shown/hidden.
-
The Show/Hide status of each node can be saved into the iAvatar
file after the character is converted so that you will not see the redundant nodes the next time
you load the character for editing again.
|
-
Repeat the steps until the 15 basic bones of the dummy are all mapped to the bones of the custom character.

|
|
|
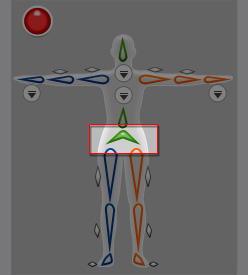
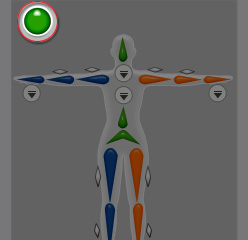
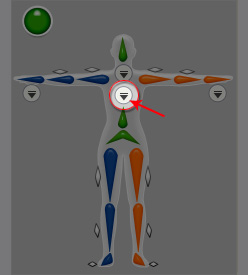
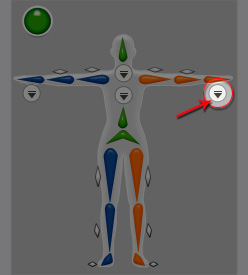
The 15 basic bones of the Reallusion Bone Structure.
|
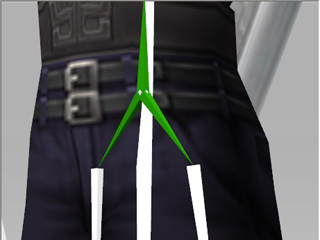
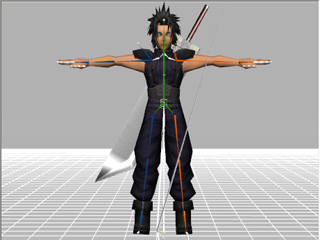
The mapped 15 bones of the custom character.
|
-
The Red Light at the left-top corner of the dummy pane will turn to Green Light, which
indicates that the custom character is ready to be converted.
Mapping Bones - Advanced Mode
If your character contains fingers, neck or spine bones, then you may need to access the Advanced mode to map the bones
to the Reallusion Bone. With these bones the converted characters' shape line will be more elegant
when the character performs motions; you are also able to apply hand animations in iClone after the finger
bones of the custom character are completely mapped.
However, you may skip this section if your custom character does not contains multiple spine, neck or finger bones.
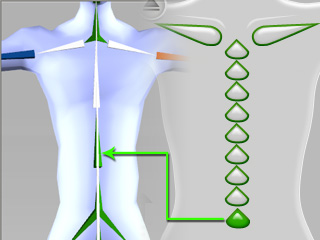
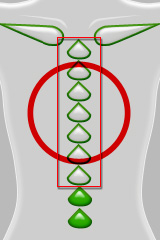
Mapping Spine and Neck Bones
-
Follow the steps described above to map the 15 basic bones.
-
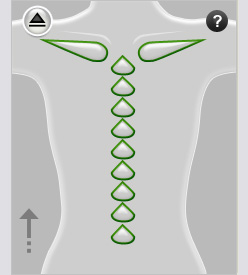
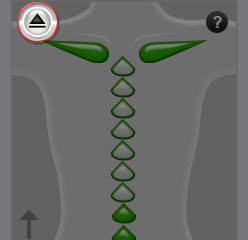
Click the Spine Page button to enter the advanced spine setting mode.
|
|
|
Click on the Spine Page button.
|
The dummy pane changes for mapping spine bones.
|
-
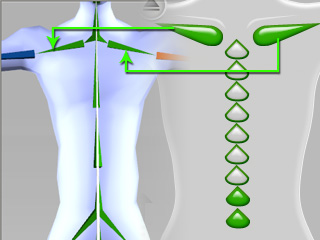
Map the spine bones in the bottom-up order.
|
Note:
|
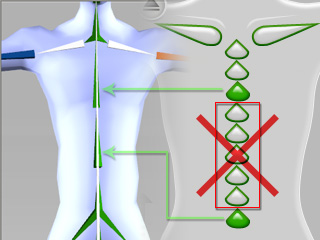
-
Sequentially map the bones without skipping any one of them. You may leave the rest of the bone segments
un-mapped if the character's spine or neck bones are fewer than the bone segments
shown in the dummy image.
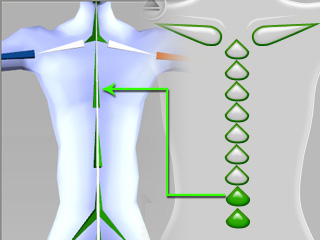
-
If the custom character's spine bones are fewer than those of the Reallusion Bones, then you are able to
leave the other spine bones of the dummy un-mapped.
-
The collar bones can be optionally mapped; however if your character has collar bones, then map them to have a better
animation posture later in iClone.
|
-
Click the Body Page button to switch back to the full-body dummy page.
-
Click the Neck Page button and follow the same method to map the neck bones.
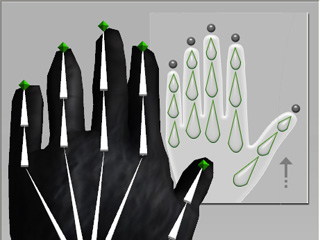
If your custom character contains finger bones, then you may map them so that they can perform hand
gestures in iClone. You are allowed to map up to five fingers per hand and up to
three finger bones per finger.
Mapping the tip bones also determines the hotspots for starting floor contact reactions.
-
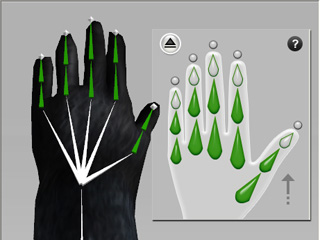
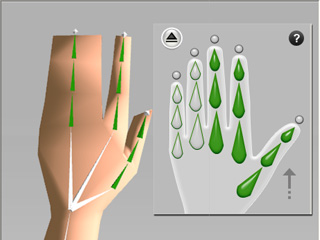
Click the Hand Page button.
|

|
|
Click on the Hand Page button.
|
The dummy pane changes to the page for mapping finger bones.
|
-
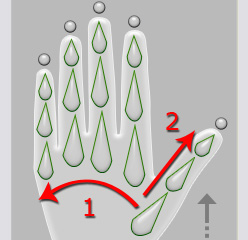
Map the fingers in the order from thumb to small finger and from the knuckle bones to the tip bones.
|
|
|
-
From thumb to small finger.
-
From knuckles to tips.
|
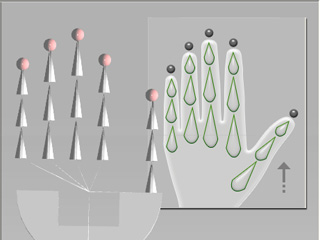
Mapping for characters with five fingers.
|
Mapping for characters with three fingers.
|
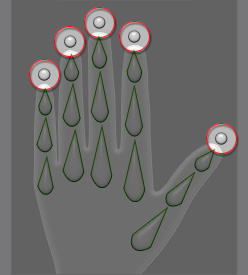
-
The tip circles in the dummy image are used to determine the hotspots for
Floor Contact.
It is highly suggest that you map the tip bones to the circles in order to have the correct reaction to this feature.
-
If the character is constructed in iClone with the attach feature, then you must
add dummy props to the tip props and map them
to the tip circle of the dummy image to define the starting point for the contact feature.
-
If the character is from other 3D tools, then remember to map the tip
balls of the finger bones to
the tip circle of the dummy image to set the start point of the reaction for the contact feature.