| |
| Use Template Map Materials to Design Characters. |
| |
|
Template Map Material |
| |
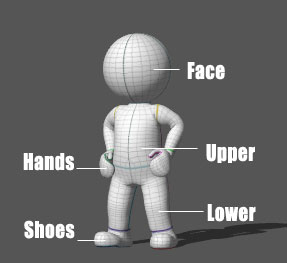
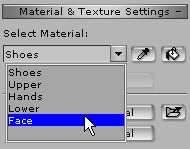
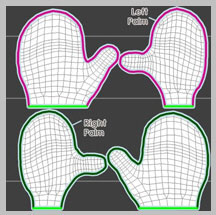
| Every body part has its corresponding Template Map Material. |
| |
|
| |
| Template Map |
| |
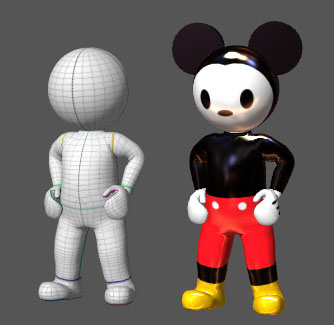
| From template map to final design. |
| |
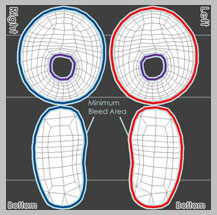
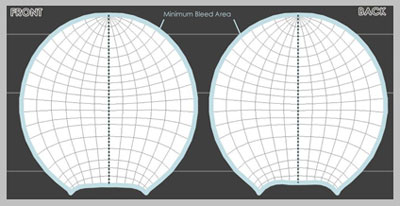
| The Minimum Bleed Area in the UV reference image indicates where to paste and fully overlap your design patterns. This prevents image-distortion at the side seams of the outfit. |
| |
| The edges of the same color contour lines will later be sewed together. |
| |
|
| A |
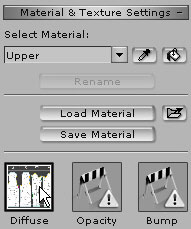
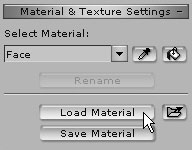
Select the Diffuse Channel and launch the texture to use the photo editing software of your choice. (e.g. Photoshop) |
| |
|
| |
|
|
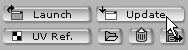
Save the image and Update. |
| |
 |
| |
|
|
Save each body part and update as below. |
| |
| Upper: |
 |
 |
 |
| Lower: |
|
| Hands: |
|
| Shoes: |
|
| Face: |
|
| Final : |
 |
|
| |
|
|
We provided several sets of Materials that are already made.
You may load these materials according to body parts. |
| |
|