| |
Use the current 3D resources with Mechanic Tool Kit to make your car controllable by AML |
How it works: |
| |
| A. |
Get 3D Model. |
| B. |
Use 3DXchange to edit and export. |
| C. |
Use Mechanic Tool Kit in iClone3. |
|
| |
| For more details, please follow the step-by-step instructions below. |
|
 |
A. |
Get 3D Model |
| |
| 1. |
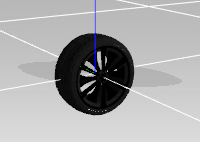
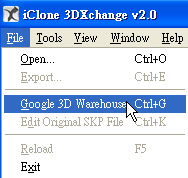
You can use 3DXchange to download car models from Google 3D Warehouse. |
|
| |
 |
| |
| 2. |
You can also use the 3D model that you created |
|
|
|
B. |
Use 3DXchange to edit and export |
|
|
| 1. |
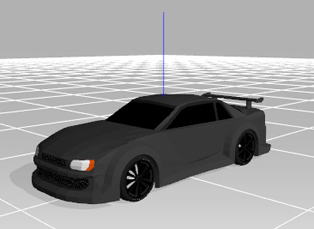
Load the 3D model that you created or downloaded. |
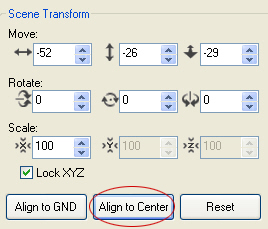
| 2. |
Choose Align to Center to make your car at the center of the world axis. |
|
| |
| |
| |
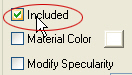
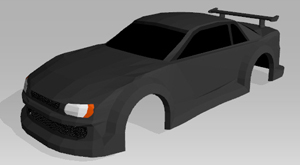
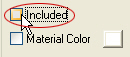
| 3. |
Choose each wheel in 3D exchange, uncheck Included, export the model, and rename it (i.e. Car.vns). |
|
| |
|
| |
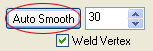
Tip: If the model has too many hard edges, choose each of them and execute.
Auto Smooth, and adjust the value based on your needs. |
|
| |
|
| |
|
| 1. |
Load the 3D model that you created r downloaded again. |
|
| 2. |
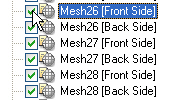
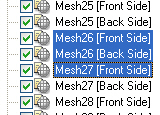
Make which Mesh belong to the wheels that you need from the Scene Tree. |
|
| |
|
| |
| 3. |
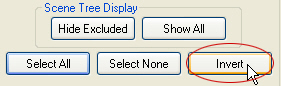
Choose all the wheel Mesh from step 2, execute Invert, and uncheck Included from Scene Tree. |
|
| |
|
| |
| 4. |
Execute Align to Center to make the center of the wheel at the center of the world axis, and then rename it after you export it (i.e. Wheel.vns). |
|
| |
|
|
C. |
Use Mechanic Tool Kit in iClone3 |
| |
| Use Wheel Tools |
| |
| 1. |
Load Car.vns. Make it face the camera and adjust the size. |
|
| |
|
| |
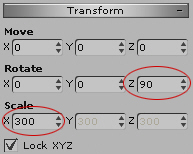
| 2. |
Load Wheel.vns, and adjust the scale based on car body. You may want to hide the car body to make this process easier. |
|
| |
|
| |
| 3. |
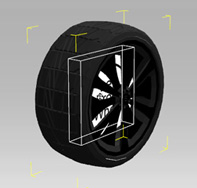
Load Mechanic Tool Kit/Wheel_Tools/L_Front_Wheel.iprop |
|
| |
 |
| |
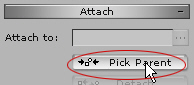
| 4. |
Assign Parrent of Wheel.vns to L_Front_Wheel.
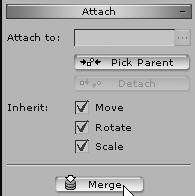
Choose Wheel.vns, and click Pick Parent, and choose L_Front_Wheel to generate structure. |
|
| |
|
| |
| 5. |
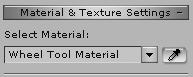
Set Opacity for Wheel Tool Material to 0. |
|
| |
|
|
|
| |
| 6. |
Choose the top layer and click merge. |
|
| |
 |
| |
| 7. |
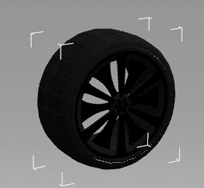
Display the car body, and place the wheels to appropriate locations. |
|
| |
| 8. |
Do the above process to the other wheels. |
|
| |
 |
| |
| Use Spring Tools |
| Give your car the bumpy feeling while it's moving |
| |
| 1. |
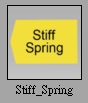
Load iCar Body Shop/Mechanic Tool Kit/Spring_Tools/Stiff_Spring.iprop |
|
| |
 |
| |
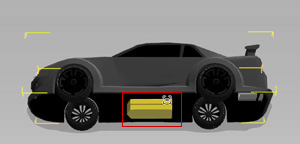
| 2. |
Choose Car, and assign the Car Parrent to the top structure of Stiff_Spring. |
|
| |
 |
| |
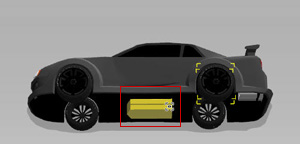
| 3. |
Choose Wheel, and assign each Wheel Parent to the bottom structure. |
|
| |
 |
| |
| 4. |
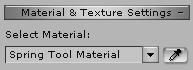
Set Opacity for Spring Tool Material to 0. |
|
| |
|
| |
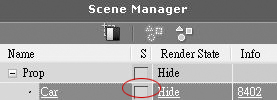
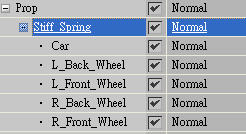
| 5. |
Check to see if the naming is the same as the default setting in the Scen Manager. |
|
| |
 |
| |
| 6. |
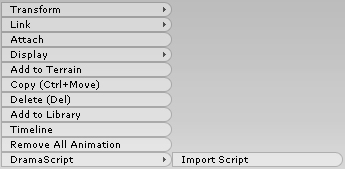
Select Stiff_Spring and right click to load Four_Wheel_Stiff_Spring.aml |
|
| |
 |
| |
| Preset DramaScript are located under. |
| C:\Program Files\Reallusion\iClone 3\Template\iClone Template\DramaScript\iCar Body Shop\Mechanic Tool Kit |
| |
D. |
Fabrication complete. |
| |
| You can control your car freely now by entering the Director mode. |
| |
 |
| |
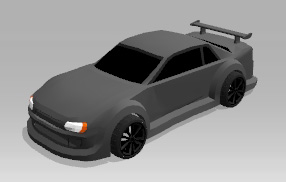
| The car model above is provided by Google 3D Warehouse Sketchosaurus®. |
| |