Demystify the 4WD Structure
In the Physics Toolbox, you get a free bonus structure that is almost suitable for use with any kind of
4WD (4-wheel drive) vehicle.
You can get the project from
Windows XP:
C:\Documents and Settings\All Users\Documents\Reallusion\Template\iClone 5 Template\iClone Template\Project\Physics Toolbox\Bonus Project
Windows 7: C:\Users\Public\Documents\Reallusion\Template\iClone 5 Template\iClone Template\Project\Physics Toolbox\Bonus Project
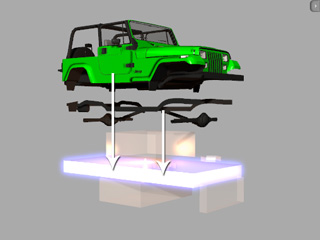
The Structure of the Vehicle
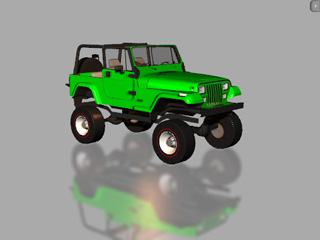
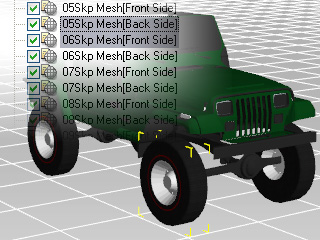
The bonus vehicle is actually composed of two main parts, one is the true
meshes of the vehicle that include the hull, the chassis and the wheels;
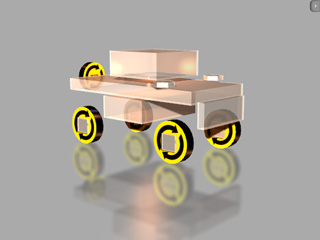
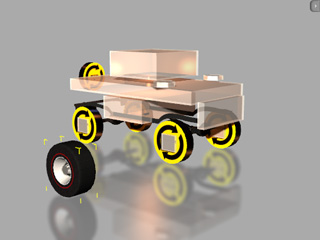
the other is a physics structure with constrained dummies that
are used to provide power, to control the direction and to to generate
suspension effects for the entire vehicle structure.
|
|
|
The vehicle is composed of different meshes.
|
Also included are dummies to provide physics effects.
|
Preparing Vehicle Models
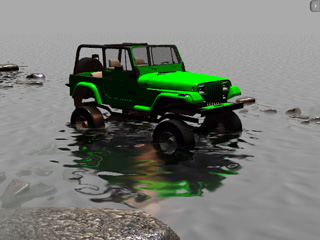
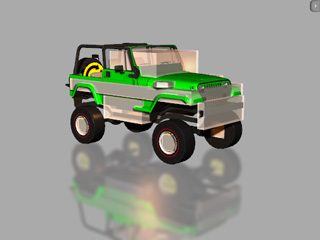
The green monster truck you get from the Physics Toolbox is downloaded from the Google 3D Warehouse and
the copyright belongs to the
original author.
Do not re-distribute it or use for commercial purposes.
You may download any sort of vehicle from
Google 3D Warehouse or create one for yourself, and then follow the steps below to generate your custom
4WD.
-
Download and save the desired car model (*.skp made by Google SketchUp
6, 7, 8 only) from the Google 3D Warehouse.

-
Load the model into 3DXchange 4 or later version.
-
Separate the car into different parts (Chassis, Hull, Wheels at least):
-
Double click on the part or parts you want to dissect.
-
Click the Make Sub-Node button to define the part(s) you want as an isolated
sub-node of the model.
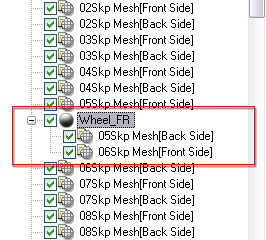
-
Repeat the step until all the desired parts are isolated.
-
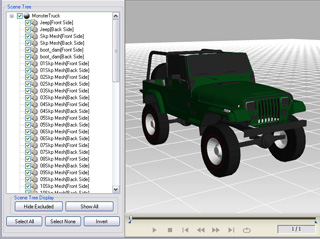
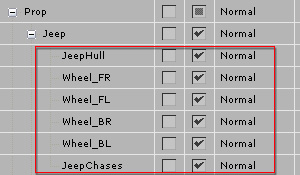
Export the entire model to iClone. The dissected parts can then be
seen in the Scene Manager and be individually modified.
-
For more information about making sub-props, please refer to the
Converting Model to Static 3D Prop
section of
3DXchange Help.
Assemble the Model to the Physics Structure
After the meshes are prepared, you are able to assign them to the physics structure. The meshes do not
need to be Physics Objects because the physics dummies of the physics structure take
charge of the reaction to the physics simulation.
You can get the 4WD dummy iProp from
Windows XP:
C:\Documents and Settings\All Users\Documents\Reallusion\Template\iClone 5 Template\iClone Template\Props\Physics Toolbox
Windows 7:
C:\Users\Public\Documents\Reallusion\Template\iClone 5 Template\iClone Template\Props\Physics Toolbox
-
Select the physics structure. Make sure it is located at (0, 0, 0).
-
Apply the converted car from the Content Manager.
-
Select a dissected part of the car.
-
Right click on the part and select the Align command.
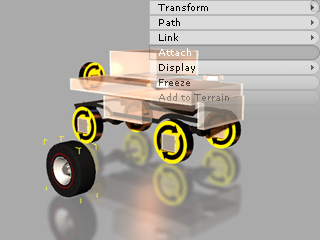
-
Click on the target dummy of the physics structure. In this case, the front tire is attached to the Motor A
at the front.
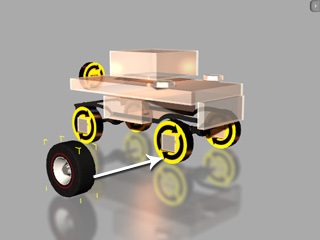
-
Transform the part so that the position, the angle and the size are aligned to the dummy.
-
Repeat the previous step until all parts are attached to their corresponding dummies.
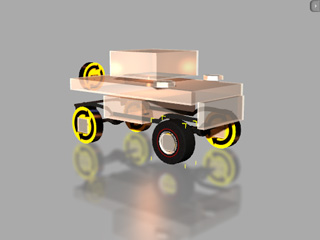
-
The chassis and the hull parts are attached to the Body dummy of the physics structure.
-
The tires are attached to the Motor A dummies of the physics structure.

-
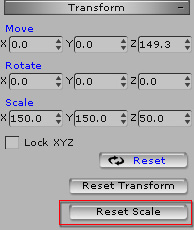
Reset the scale of the parts to prevent from sudden distortion during the simulation by selecting
the root of the entire structure (the car mesh plus the physics structure) and clicking
the Reset Scale button. For more information, please refer to the
Fixing Sudden Transformation During Simulation section.
Controlling the Vehicle
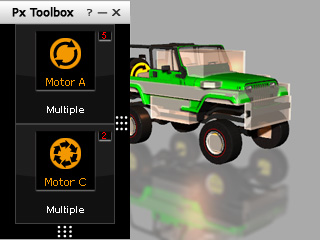
After the attaching is done, you are able to control the vehicle via the Control Tile Panel.
-
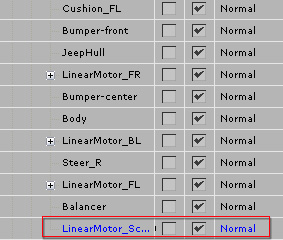
If the Control Tile Panel is hidden, then select the dummy that is highlighted in blue in the
Scene Manager.
-
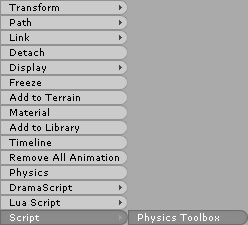
Right click on the 3D viewer and then select the Script >> Physics Toolbox command
in the right-click menu. The Control Tile Panel will instantly appear.
|
|
|
Using right-click menu to show the Control Tile Panel.
|
The panel instantly appears.
|
-
Use the Motor A control to determine the speed of the vehicle.
-
Use the Motor C control to determine the direction of the vehicle.
|
Note:
|
|
You may open the Advanced Panel of the Motor A to set the max speed of the
vehicle and the Advanced Panel of the Motor C to set the
max rotation angle for the front tires.
|
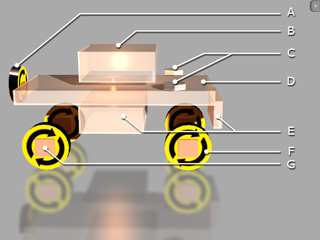
The Dummies and Settings of the Physics Structure
The Dummies of the Structure
|
-
Physics Object with Lua Script: The only physics object that holds the lua script.
-
Mass Balancer: It is used to balance the entire structure from tilting.
-
Steering columns: For turning left or right.
-
Main Body: The root for all constraints and attachments.
-
Bumpers: Keep the structure from penetrate into other physics objects.
-
Wheels: Propelling power of the entire structure.
-
Suspension Systems: Spring effects for the wheels.
|
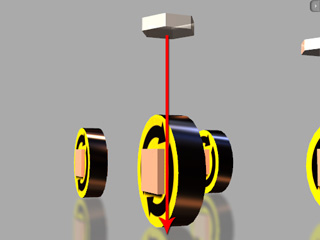
-
The four wheels (F) are constrained to the suspension systems (G)
by Hinge constraints.
-
Align the steering columns (C), the suspension systems (G) and the wheels (F) to the
vertical line (Z axis).
It ensures the structure remains intact even when it encounters heavy motion impacts on a bumpy terrain.
-
Use the balancer (B) cube to adjust the mass forward or backward; it will keep the car balanced despite sudden movement or when it hits the bumpy road
to prevent the car from flipping.
-
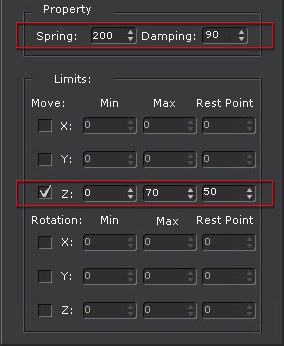
The 2 front wheel cushion cubes (G) are constrained to the steering columns (C), and the back wheel cushion cubes are constrained to the car body (D)
with Spring Constraints. The settings of the spring constraints are shown in the illustration below:
|
Spring = 200
|
|
Damping = 100
|
The suspension is rock hard and the main body remains high.
|
|
Damping = 98 ~ 99
|
Creates the smoothest air-cushioned suspension, no jittering after stopping, and is the most comfortable design.
|
|
Damping = 10
|
The suspension effect is extremely hyper, soft and jumpy; but the result is quite good.
|
|
Damping = 0 ~ 1
|
The suspension effect is too sensitive, which cause the car to fly around a little too much.
|
|
If the Spring equals to 20, you can get a very soft and slow spring effect, which creates a more
cartoonish appearance.
|