

|
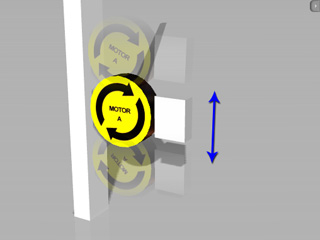
With the motors in the L1 Force category of the Physics Toolbox, the custom structure are not only able to move along the ground plane, but also any particular direction by adding a Generic Constraint. In the following example, a wheel is set up to climb a vertical pillar.
|
|
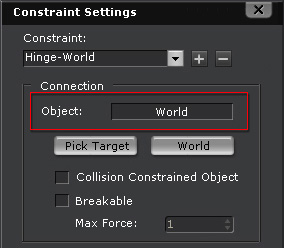
In order to set the wheel free, you need to constrain it to another free (or axis-limited) moving rigid body.
|

|
|

|

|
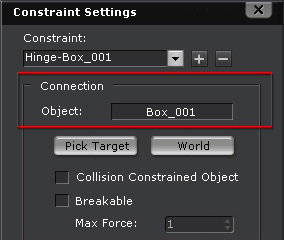
To prevent the structure from falling, the constraint settings need to be adjusted to restrict its movement, in this case the Local Z axis. You may normally think of the Slider Constraint for this situation, however, since the adjustable parameter of a slider constraint is restricted to only the X axis, you need to spend time to modify the pivot direction of your prop, which can take extra time.
That being the case, it is highly recommended to use the Generic Constraint for confining its movement.

|
|
|
Because of gravitational effect, the structure can not easily climb up unless the velocity of the motor is maximized; while it unexpectedly moves down too fast even if the velocity of the motor is small. You need to adjust your wheel specifications in two ways:
If the Friction value of the motor is low, the motor slips as it rotates, which will prevent your wheel from easily climbing the pillar.
By increasing the Friction value, the effect of the gravity is reduced as the climbing wheel gains a better grip on the surface of the pillar.
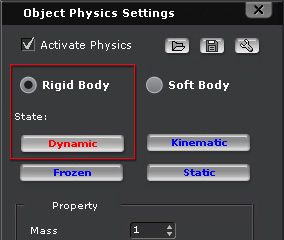
- Go to the first frame and press Shift + F9 to show the Object Physics Settings panel.
- Select the motor and the pillar.

- Increase the Friction value.

Alternatively, you can also adjust the position of the motor so that it contacts more with the pillar without changing the value of the friction.
- Go to the first frame and select the motor.
- Zoom in to the contact point of the motor and the pillar.
- In the Transform section of the Modify panel, fine-tune the position of the motor by 0.1 at a time so that the motor penetrates the pillar a little but not too much.

After utilizing either of these two methods, press the play button in the Physics Tile Control panel. The structure will then rise and fall more accurately in accordance with the velocity
of the motor.