Transition Curves in Tracks
(New for 5)
In iClone, you are able to set keys or add clips into different tracks. Interpolations can be
customized between different curves so that the transition speeds between two adjacent keys, or clips, imitate the physical characteristics of how the object would move in the real world.
Set the Transition Curve
-
In the target track of the timeline, set two keys (take the Transform track
as an example).
-
Right-click on the Later one. Select an item from the Transition Curve entry in the menu.
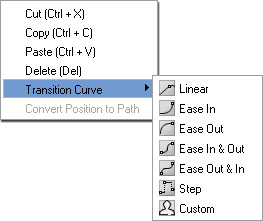
The transition curve will then be generated between these two keys only.

Transition Curves
Transition between Clips
With the same concept, you may also set transition curve between two adjacent clips.
-
Apply two different motion clips to a character.

-
Select the later clip to show the blend part of the clip.

-
Drag the edge to overlap it to the previous clip.

-
Right-click on the later clip in the Motion track of the character.
-
In the right-click menu, select the Transition Curve entry and pick any one of the effects.
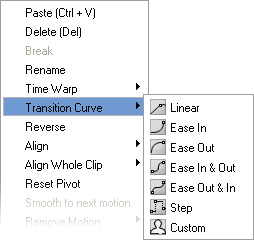
The transition curve will only be generated in the blending area.

|
Note:
|
|
Please note that you may select multiple keys, or clips, to apply the same transition curve at the same time.
|
Dramatizing the Transition Curves
If you need more dramatic transition results, then you may use the Custom feature provided in the pop-up menu to adjust the
steep of the transition curves.
-
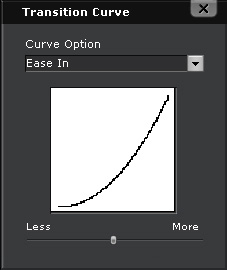
Right-click on the Later key or clip. Select Transition Curve >> Custom.
-
Select a curve type from the Curve Option drop-down list.

-
Drag the slider to increase or decrease the variation of the curve. Note: When you decrease to the left-most side, the curve will be very similar to the linear curve.