In stead of setting several Motion Layer keys to reach a character's head, hands or feet or a target object, you may
use a Reach Target key to easily accomplish this animation.
Setting Reach Target Keys
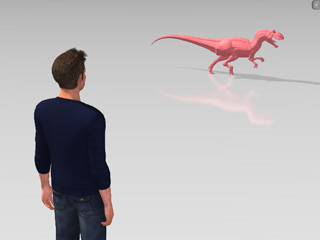
Apply a character and a target object (mostly a prop).
Move to another time frame where you wish the character to point at the target object.
Pick the character, go to the Animation >> Motion,
and click the Edit Motion Layer button in the Modify panel. Switch to the
Reach Target tab.
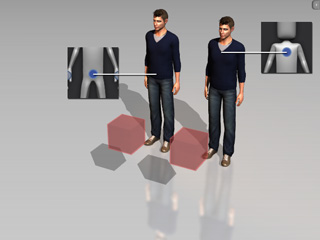
Select the right hand effector point from the left dummy pane.
Click the Pick Target button, and
then pick any object on the 3D preview window to specify the target. The right hand
effector point will turn
from to ; which indicates that
the corresponding body part is pointing at an object.
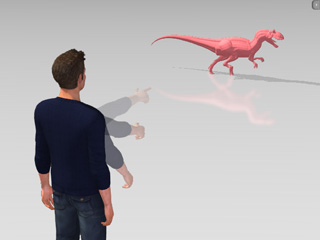
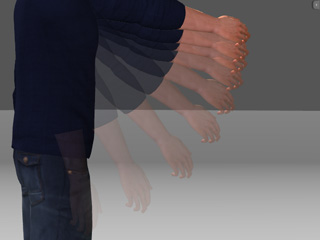
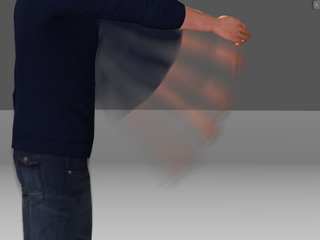
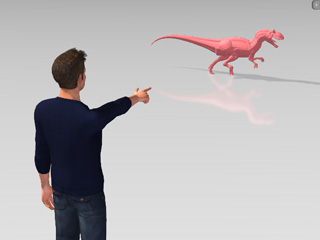
The character reaches out the right hand and points at the
prop.
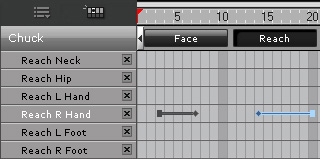
The reach target key in the timeline.
Note:
Please note that the body part of the character only
points at the target after this step.
Optionally change the hand gesture so that the character really looks like its pointing at the target.
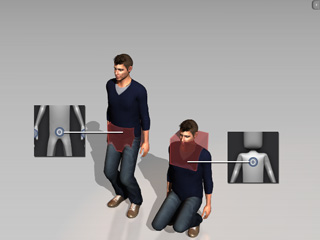
Move to another forward time frame. Select the same effector point and then click the Release button.
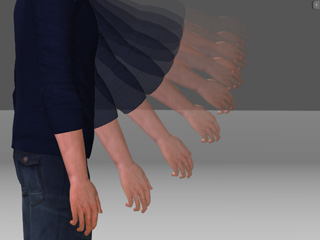
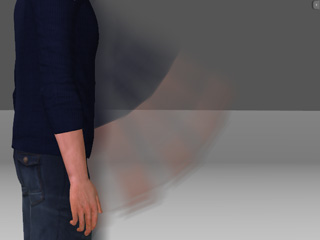
The character then stops pointing at the target.
The character gradually puts down his right hand.
The release key in the timeline.
Note:
After releasing the target, you may then have the character point at another object.
If you set Reach Target keys to the Pelvis or Chest
effector points, then they will instantly
snap to the target's pivot. You can drag them back where they are by
Keeping the Original Poses or Motions to the
effector points of the limbs.
Please refer to the following sections for more information:
In case reaching and releasing keys cause body parts to act abruptly, these two kind of keys contain blending durations. You may then
adjust the duration so that the reacting time can be prolonged or shortened. In
addition to that, you may use the blending keys to avoid body parts
from twisting when they are pointing or contacting with targets.
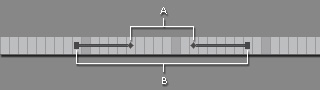
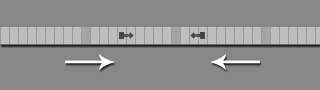
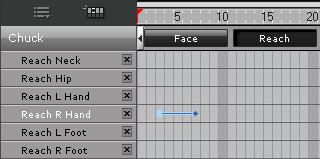
A - Reach Target key and Release key.
B - Blending Start key and Blending End key.
If the durations are prolonged, then the reaching or releasing motions will be slower.
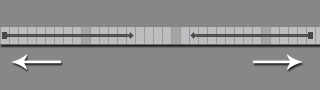
Drag the blending keys away from the Reach Target and Release keys. The motions
are slower.
On the contrary, the motion will be quick and sudden.
Drag the blending keys close to the Reach Target and Release keys. The motions
are quicker.
 button in the Modify panel. Switch to the
Reach Target tab.
button in the Modify panel. Switch to the
Reach Target tab.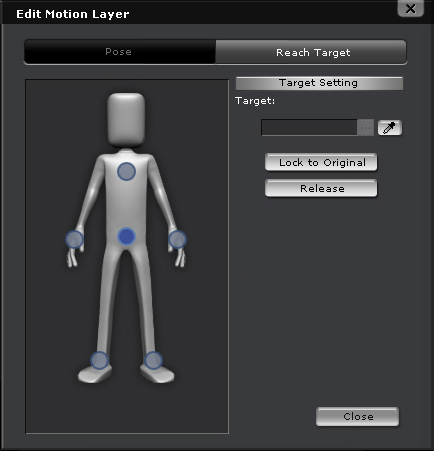
 button, and
then pick any object on the 3D preview window to specify the target. The right hand
effector point will turn
from
button, and
then pick any object on the 3D preview window to specify the target. The right hand
effector point will turn
from  to
to  ; which indicates that
the corresponding body part is pointing at an object.
; which indicates that
the corresponding body part is pointing at an object.

 button.