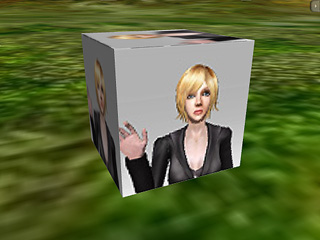
Animated Texture
To generate animated texturing effect from one single texture source, iClone allows you to import
a specially arranged image file into any texture channel. By accompanying it with an ini
definition
file uses the identical name, iClone can recognize this image texture as an
animated texture file.
You can access the sample animated texture files from \iClone
template\texture\animated
Please use either Vertex or Pixel Shader for correct Animated Texture
display.
The ini file is represented in the following format:
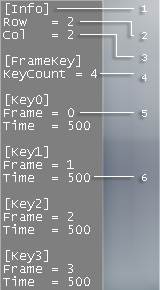
|
1
|
The header name for declaration section.
|
|
2
|
Row: Assign a value to this parameter to decide how many rows you intend to
divide the source image into.
|
|
3
|
Col: Assign a value to this parameter to decide how many columns you intend to
divide the source image into.
After you set the Row and Col values, the source image is
mapped
into a matrix containing Row x Col cells.
|
|
4
|
KeyCount: Assign a value to this parameter to decide the
total number of the cells you
intend to display after it is imported.
If the KeyCount number is less than the number of [Key N], the
excessive [Key] will be ignored during playback.
|
|
5
|
Frame: This is the cell number of the matrix.
|
|
6
|
Time: This value is the delay time of the key cell in 1/1000 sec.
|
|
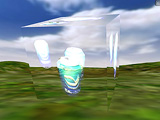
This ini file defines:
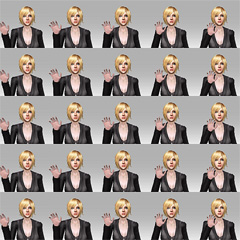
Divide the source image into 4 key cells. (Row x Col)
The cells are numbered from 0 to 3.
Displaying order is from key cell 0 to key cell 3.
Each cell display for 0.5 sec.
|
|
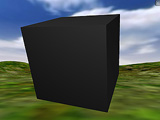
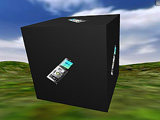
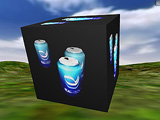
Please follow the steps to generate one animated texture for the Diffuse Channel.
-
Use any text editor to create a new text file.
-
Use the structure as shown in the illustration above.
Change the parameter values accordingly.
-
Prepare an image file. Save the text file with a filename identical to the
image file with the extension .ini.
-
In iClone, click the Open  button of the Diffuse channel to load the
image file.
button of the Diffuse channel to load the
image file.
-
Start Playback to see the result.
(The animated texture loops forever by default.)
You may generate various effects if you apply this image into another channel:
Animated Diffuse + Animated Bump + Refraction
Change the Display Order
By modifying the content of the ini file you can change the order or the frequency
which each key cell
image shows
in one loop.
In the next example, we want to have six key cell images to show up in different order in one single loop.
-
Change the KeyCount = 6. (This defines 6 key cells to show
up in one loop.)
-
Change the rest part:
[Key0]
Frame = 0
Time = 500
[Key1]
Frame = 0
Time = 500
[Key2]
Frame = 0
Time = 500
[Key3]
Frame = 0
Time = 500
[Key4]
Frame = 0
Time = 500
[Key5]
Frame = 0
Time = 500
-
Modify the order for each key cell image to show (The order is 3, 1, 0, 2,
3, 2):
[Key0]
Frame = 3
Time = 500
[Key1]
Frame = 1
Time = 500
[Key2]
Frame = 0
Time = 500
[Key3]
Frame = 2
Time = 500
[Key4]
Frame = 3
Time = 500
[Key5]
Frame = 2
Time = 500
|
Note:
|
|
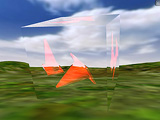
Wide-ratio images can cause severe resolution loss or cropping
problems. It is highly recommended that you use square-format
images which can save memory and preserve the best resolution.

 Example with cropping problem.
|
|
 Example with correct results. Example with correct results.
|