Adding Facial Animation Settings (New for 5.4 and for Pro only)
In addition to the body motions, a non-standard character can also
talk (with lip-sync data) and act out facial expressions. By adequately mapping
facial bones and using the Expression Editor, facial information
can be applied to a non-standard character, allowing it to create exquisite facial animations in iClone.
Step 1: Characterizing the Character
-
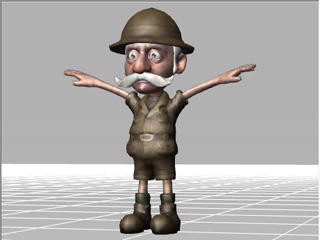
Load a biped model file with bone-skinned data. The files must follow the
conventions described in the sections below:
-
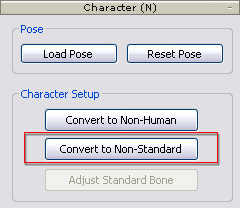
Go to the Character section of the Modify panel
and click the Convert to Non-Standard button.
-
Mapping the body bones and activate the Active box.
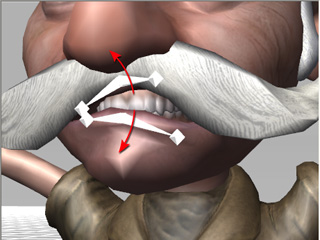
Step 2: Mapping the Facial Bones
In iClone, the eye rotations and jaw animations must be generated and triggered by facial bones.
Therefore, you need to designate the facial bones of the character, especially the Eyes and
the Jaw bones.
-
After you have finished the bone mapping procedure as outlined above, switch to the
Face / Extend Mapping page by clicking the button with a head icon
above the dummy pane.

The modify panel will switch to the Face / Extend Bone mapping mode.

-
Select the left and right eye bones in the tree view and separately map them to the
left and right eyes by clicking the Map to Left Eye and
Map to Right Eye buttons as shown below:

Please refer to the
Setting Eye Bones section for more information.
-
Select the jaw bone in the tree view and map it to the
jaw by clicking the Map to Jaw buttons as show below:

Please refer to the
Mapping Facial Bones section for more information.
|
Note:
|
-
Optionally
map blink bones so that the character can
automatically blink during the playback in
iClone.
-
If you want to manually animate or apply spring effects to
any bones of the character, then please refer to the sections below for more
information:
|
-
Click the Convert button at the bottom of the panel to convert
the character and leave the
Convert to Non-standard Character mode.
Step 3: Using Expression Editor to Add Expression and Lip-sync Details
After the model is converted into a non-standard character, you need to
add more expression data to the character via the Expression Editor.
The data will be burned into the character as soon as you export the character
into iClone and thus it will be able to create lip shapes and expressions when talking.
Optionally Preparing Morphing Data
-
Scroll to the Face Setup section.

-
Click the Add button to load one or more face-morphing files in FBX or OBJ formats.
Please refer to the
Preparing Morphing
Meshes
and Using Morph List sections for more information.
Setting Expression Information
-
Click on the Expression Editor button to launch the panel.

-
Switch to any one of the tabs in the panel (in this case, the Custom tab is used to test out the first custom puppet animation).

-
Pick a thumbnail to which you want to set relative expression data
(Bone-based or Morph-based).

-
Bone-based: Determine the positions and the angles of the bones that are related to the
picked thumbnail.
-
Morph-based: If you want the thumbnail to include any morphing effects, then drag the sliders
at the right side of the panel.
-
Click the Set button to assign the bone and morph data into the selected thumbnail.
-
If you convert the character to iClone now, then you will only see a result when you
pick the first Full Face Control preset (in which the Up thumbnail is set previously)
from the 3DX_Custom face profile in iClone and move your mouse up.
-
Repeat the steps to set expression data to as many thumbnails in
different tabs as possible.
-
After you close the panel, the expression information will be embedded into the character.
-
Export (Ctrl + E) the character with expression data to iClone. You may then use
the motion-related features (for body and face) to have the character talk and perform.
|
Note:
|
-
For more information about the Expression Editor, please
refer to the sections below:
|