Mapping Facial Bones (New for 5.4)
In addition to the body motions, a non-standard character now can also talk (with lip-sync data) and act out
bone-based facial expressions.
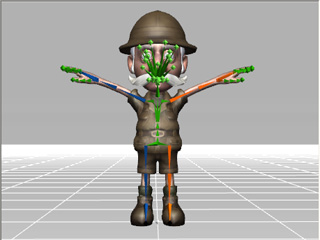
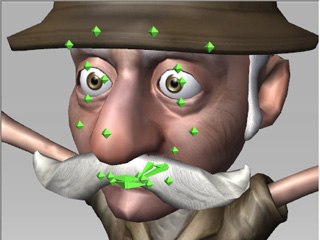
To start defining the parameters for your character's facial animation, you first need to designate the facial bones of the character and give it a correct hierarchy grouping.
Then switch to the Face/Bone Mapping section and map facial bones to the
Eyes and the Jaw.
After this, your character will be able to animate its eyes and jaw easily.
If the character contains more facial bones other than the bones mentioned above it allows for more complex and exquisite facial expressions after being converted into iClone.
Mapping Eye Bones
-
Make sure that you are in the
characterization procedure
and the Active box is enabled.
-
Switch to the
Face / Extend Mapping page by clicking the button with a head icon
above the dummy pane.

The modify panel will switch to the Face / Extended Bone mapping mode.

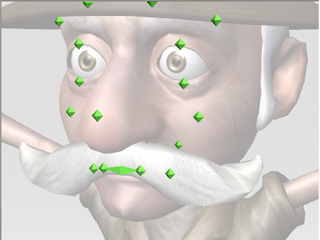
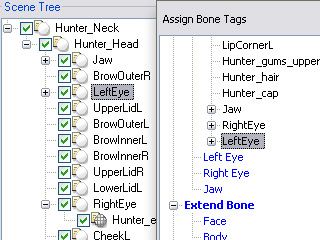
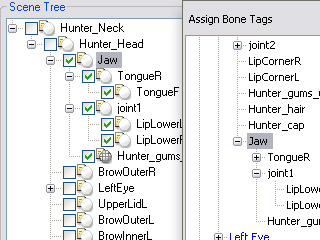
Please note that the child bones under the head bones will be
automatically put under the Face node and marked in light green.
-
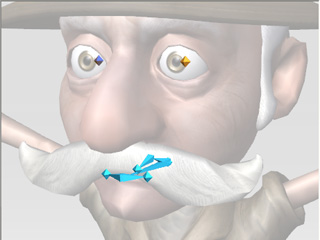
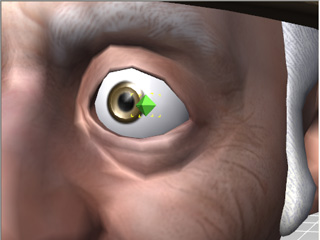
Select the left eye bone from the Scene Tree, 3D Viewer or the
Bone List under the Assign Bone Tags.
|
|
|
Select from the 3D viewer.
|
Select from the scene tree or the bone list.
|
|
Note:
|
-
Switch to the Move or Rotate tool to transform the
bone to check if the selected bone is the correct one.

|
-
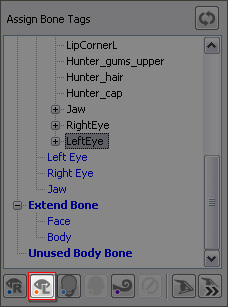
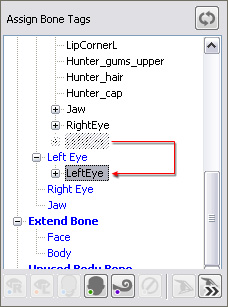
Click the Map to Left Eye button in order to map the selected bone to the
left eye (blue node) of the standard bone hierarchy.
|
|
|
Click the Map to Left Eye button.
|
The selected bone node will be move to under the Left Eye
(in blue) node.
|
-
Select the right eye bone from the Scene Tree, 3D Viewer or the
Bone List under the Assign Bone Tags.
-
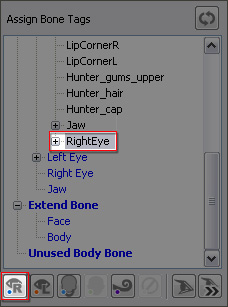
Click the Map to Right Eye button in order to map the selected bone to the
right eye (blue node) of the standard bone hierarchy.
|

|
|
Click the Map to Right Eye button.
|
The selected bone node will be move to under the Right Eye
(in blue) node.
|
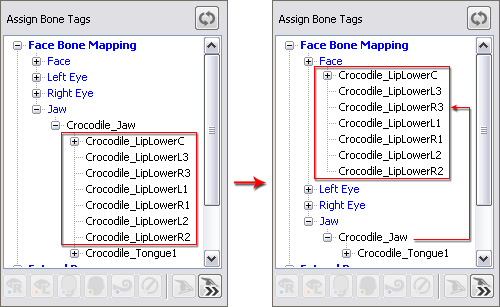
Mapping Jaw Bone
-
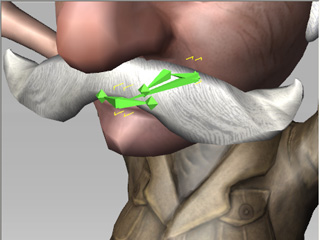
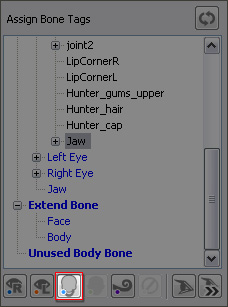
Select the jaw bone (and tongue or lower lip bones, if any) from the Scene Tree, 3D Viewer or the
Bone List under the Assign Bone Tags.
|
|
|
Select from the 3D viewer.
|
You are able to either select the parent node or
multi-select the connected child nodes.
|
|
Note:
|
-
Switch to the Move or Rotate tool to transform the
bone to check if the selected bone is the correct one.

|
-
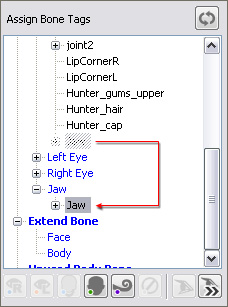
Click the Map to Jaw button in order to map the selected bone to the
jaw (blue node) of the standard bone hierarchy.
|
|
|
Click the Map to Jaw button.
|
The selected bone node will be move to under the Jaw
(in blue) node.
|
-
Click the Convert button to leave the Convert to Non-standard
mode. The data of the mapped eye and jaw bones will be recorded into the character.
 button
to move the bone node back to under the face node.
button
to move the bone node back to under the face node.