|
Alternatively, you may use the mark in and mark out triangles under the time slider to form the range.


Some model files of specific formats may contain animations. You can use 3DXchange to embed these animations into the model and convert the model into an iProp for use in iClone.
Video Tutorial: DAZ
The supported file formats for this pipeline are:
|
Supported File Format |
.FBX .3ds |
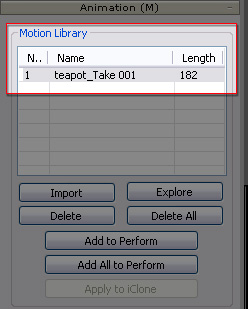
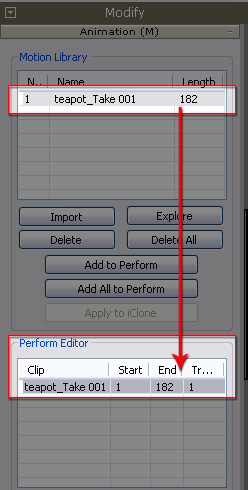
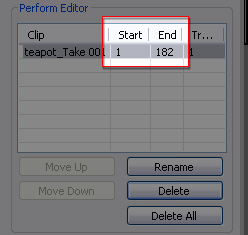
Since the original animation clips are all merged into one-single clip after the model is loaded, you must first manually split them into individual clips:
|
|
Load a bone-skinned FBX model file with bone-offset animations.
A message prompt will appear as below:

Enable the Import Animation box and type in the number you want to sample per second. The higher the value, the more details will be extracted from the original animation.
Enable the Smooth Curve and type in a time range if you want to eliminate the severe-rotation-change issue within that range. The unit value is milli-seconds.
Play back to sequentially view all the animation clips.
Note:
You may also modify the material of a selected mesh node before converting the model into a prop. Please refer to Material Section for more information.