Preparing Blend Shapes (New for 5.4)
A blend shape is a model that is created by modifying a base model mesh so that the two meshes
have different shapes with an identical vertex number. In 3DXchange, you can use the
blend shapes to change the shapes and appearances of a base character without touching the bones
of the character.
Creating blend shapes before Using 3DXChange
You can create the blend shapes before loading the base character and the blend shapes to
3DXchange (In this case, the base character and its corresponding blend shapes are
created in Maya).
-
Create a base character mesh.
-
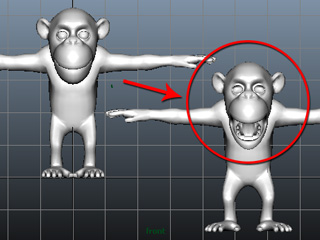
Duplicate the mesh and sculpt the new mesh. The new mesh will thus become one of the blend shapes.
-
Select the new mesh and export it as an OBJ or FBX file.
-
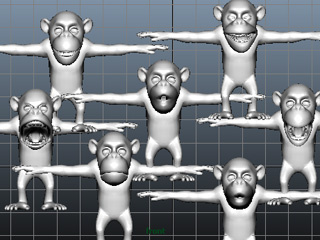
Repeat step 2 several times to generate different meshes with various morphing styles.
-
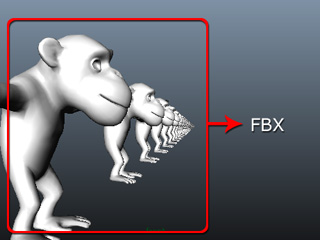
Select these new meshes and export them together as single FBX file.
|
Note:
|
-
If you want to bone-skin the original base mesh and export the bone-skinned model as an FBX file,
then please remember that the rotation data for each bone must be (0,0,0).
-
Please note that you may either export the
individual meshes into OBJ or FBX format
or export
multiple meshes into FBX format.
-
An FBX file with multiple blend shapes can
then be loaded into the Morph List.
-
If you have used the blending shapes for morphing the character
in Maya and you want to
re-use the blending shapes in 3DXchange, then export the bones,
the rigged character meshes and the morphing meshes
in FBX 2011 format to ensure compatibility with 3DXchange.
|
Sculpting Existing blend shapes
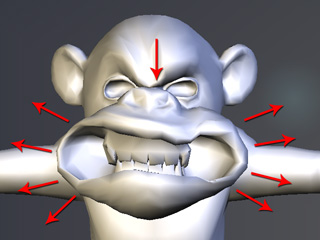
If you want to sculpt an existing blend shape, in order to fine-tune or dramatize
the facial expression, then please follow the steps below. This method can be applied
to the meshes that are exported from a model before or after the characterization procedure:
-
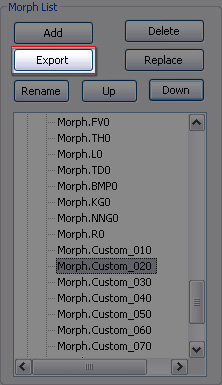
Select an existing item that you would like to modify in the Morph List.
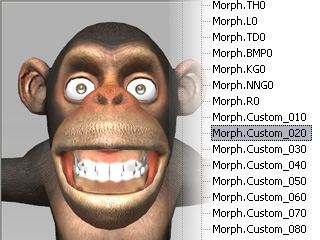
-
Click the Export button to export it as an OBJ file.
-
Load the OBJ files into your favorite 3D tool and sculpt the mesh of the model.
-
Save the model to keep the sculpting result.
-
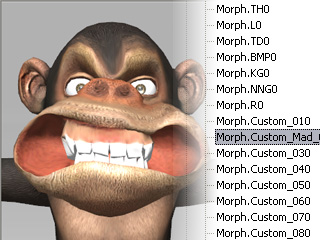
In 3DXchange, click the Replace button in the Face Setup section.

-
Load the modified model to replace the select item in step one.
|
Note:
|
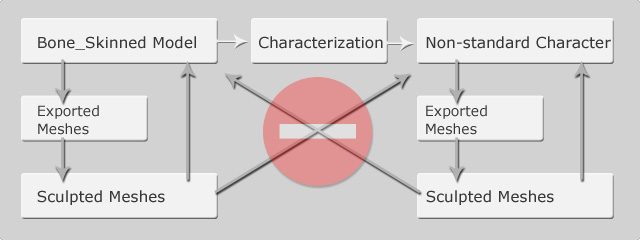
-
If the mesh is sculpted by using a base mesh of a
character that is not yet converted to a non-standard
character, then do not import them as blend shapes after you convert the
model into a non-standard and vice versa, in order to prevent
unexpected mesh-offset issues.
|