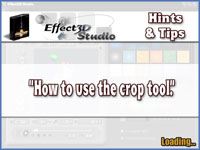
| Using
the crop tool
The crop tool can be used if you want to 'Save Frame' or 'Copy
to clipboard' only a part of the preview window contents.
When the crop tool is selected move your mouse pointer to
the area of the image you wish to use, hold down the mouse
button and drag to highlight your selected area. Holding down
the mouse button within the selected crop area allows you
to move the boundary. Clicking the mouse pointer outside the
selected area will remove boundary.
Drag-and-drop
content into the preview screen
Any content can be dragged from the galleries into your project
by clicking on a thumbnail, dragging it into the preview screen,
and then releasing the mouse.
You can also use drag-and-drop to import
JPG, GIF or BMP image files as a background image for your
project, and 3DS or SCX 3D objects files as the 3D object
for your project.
Only
use the anti-alias feature when rendering your final project
To speed up navigation of the application in the creation
stages, set anti-alias to 'none'. When setting anti-alias
to 'good' or 'best' the application is actually rendering
an image x4 or x16 larger than the appearance in the preview
window.
Don't forget to enable the anti-alias feature
when you export to give a smoother result
Select
the best camera lens to suit the depth perception of your
project
Altering the camera lens will change the field of view and
most importantly the perception of depth in your project.
Depending on your application, the background image used,
and the effect you want to produce select a small lens (20mm)
to exaggerate the feeling of depth and select a large lens
size (80mm) minimize the effect.
Fit
aspect ratio, Fit background size
When importing or opening a background image selecting the
'Fit aspect ratio' option will fit the longest side of the
background to the dimension of the project. The shorter side
will scale to fit based on the same ratio. When selecting
the 'Fit background size" option the project will be
re-sized to the dimensions of the background image.
Arrange
your gallery content
You can arrange your gallery content to your liking by creating
new categories and then adding your favorite content. This
will help if using certain settings and content for a specific
project. You can quickly arrange content by right clicking
on one of the content thumbnails and selecting to cut, copy,
paste or delete.
Anti-alias
and rendering effects
Using a different level of the anti-alias effect in combination
with the artistic rendering styles will change the quality
and density of the applied effect. Using the anti-alias effect
the detail of the effects may be dramatically affected. Try
the rendering style with each different level of anti-alias
to see which looks best for your application.
Locked
character spacing with dynamic text effects
When using one of the 'still' text templates altering the
'text width' setting will alter the width of the text and
the character spacing by the same ratio. When using a 'dynamic'
text template the character spacing is fixed. Increasing the
'text width' setting will increase the width of the characters
themselves, but it will not alter the spacing between them.
If you increase the width a large amount the characters can
merge into one another.
Import
3DS format objects
Effect3D Studio is capable of importing standard 3D objects
using the 3DS file format. You can import 3DS objects, and
then apply Effect3D's wide range of animation and rendering
effects.
When imported Effect3D adds a yellowish
tone to objects, this is because black and white do not respond
to color adjustment. By adding the yellow tone it is easy
to change the object to your desired color via HSV adjustment.
Effect3D provides an absolute glossiness option in the Real
artistic style, the reason for this is different 3D software
often generate 3DS files with different material settings
and the specular value set to zero, therefore you are not
be able to adjust the glossiness within Effect3D without this
option being set (every value multiplied by zero is still
zero). By turning on this option you are able to make the
material as glossy or as matt as you wish.
The lighting settings are optionally not
imported with a 3DS file. When using the settings included
with a 3DS file it will often limit how you can adjust the
model within the Effect3D application. Light settings for
imported models can range widely. This can make a model appear
too dark or too bright when using the original settings. |