 button to open the image processing tools and enhance the image.
The image processing tools allow you to enhance the quality of the selected image, rotate it, or crop it to use only a portion of the original source image. This allows you to focus specifically on the facial details within an image and results in more accurately talking images.
Click the Image Processing
button to open the image processing tools and enhance the image.
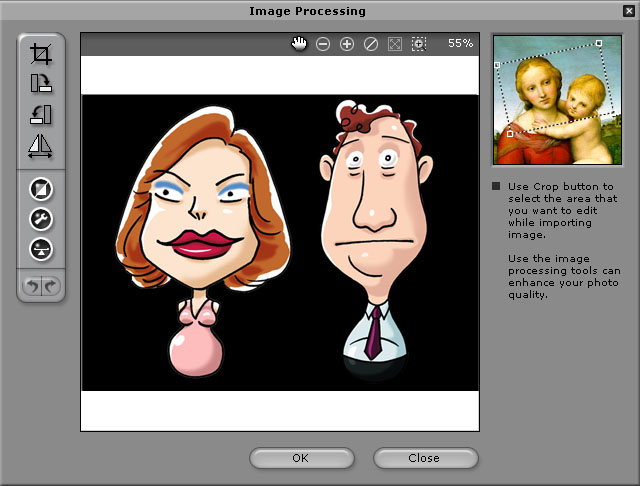
You can then use the tools on the left side of the image processing menu to adjust
the area, quality, and color settings of the image as follows.
Click the Crop Image
button to select only the required image area. This can be useful when you want to select a face from a group photo or remove a large background area which is not needed for the model. Cropping the image allows you to remove excess background area and enlarge the facial image you wish to turn into a moving image. This does not change the original image size.
Drag a marquee across the image using the mouse to create a crop box. Use the corner handles of the marquee to rotate the crop box. Use the mouse to move the crop box across the image as desired. Click the
button when done. Click the
button to cancel the current crop box and restart.
Click the Rotate CW
or Rotate CCW
button to rotate the image by 90 degrees in the clockwise or counter clockwise direction.
Click the Mirror
button to mirror the image on the horizontal axis. This function is useful for images obtained from scanners or cameras.
Click the Smart Level
button to adjust the color levels of the image automatically. CrazyTalk analyzes the color levels and adjusts the brightness, contrast, hue, and saturation levels to achieve optimum image quality.
Click the Color Level
button to adjust the brightness, contrast, hue, and saturation levels of the image manually. Use the sliders in the menu box to adjust the values or enter the numerical values for each parameter in the boxes next to the sliders.
Click the Color Balance
button to adjust the color balance manually. Drag the sliders to adjust the Cyan - Red, Magenta - Green, and Yellow -Blue levels. The box next to each of the respective properties shows positive or negative values depending on the position of the slider, with the center being zero. Select the Highlights radio button to apply the color settings to the image's brighter areas. Click the Midtones radio button to apply the color settings to the image's regular areas. Select the Shadows radio button to apply the color settings to the image's darker areas.