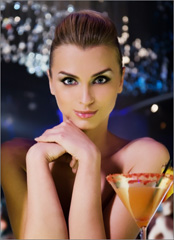
You can create your own customized CrazyTalk Model using any digital image of your own snap, a picture of your friend, colleague, or family member, a photo from your digital camera, or an image from a scanner.
To create a CrazyTalk Model:
To choose an image as the model, do one of the following:
Click Import
Image
 to import a jpg, bmp, tga or png image.

Click Advanced Facial Settings
 button to specify the settings for the Eyes,
Teeth, Mouth and Lips.
button to specify the settings for the Eyes,
Teeth, Mouth and Lips.

You may also click Import  button to import custom images (JPG, BMP, TGA, PNG,)
with or without alpha channel as the
texture of the character's Eyes (256 pixels x 256
pixels) or Teeth (256 pixel x 166 pixels).
button to import custom images (JPG, BMP, TGA, PNG,)
with or without alpha channel as the
texture of the character's Eyes (256 pixels x 256
pixels) or Teeth (256 pixel x 166 pixels).
Click
Image Processing
![]() to open the image processing tools
and enhance the image.
to open the image processing tools
and enhance the image.

If you import an image from your local folders, the image processing screen is automatically opened. If you do not want this screen to open automatically, uncheck the Show while importing check box the first time the screen opens after importing an image.
Click Crop
Image
![]() to select the required image area.
to select the required image area.
Click Rotate
CW
![]() or Rotate CCW
or Rotate CCW
![]() to rotate the image by 90 degrees in the clockwise
or counter clockwise direction.
to rotate the image by 90 degrees in the clockwise
or counter clockwise direction.
Click Mirror
![]() to create a mirrored reflection of the image.
to create a mirrored reflection of the image.
Click Smart
Level ![]() to adjust the color levels of the image automatically.
to adjust the color levels of the image automatically.
Click Color
Level ![]() to adjust the brightness, contrast, hue,
and saturation levels of the image manually. Use the sliders in the menu
box to adjust the values or enter the numerical values for each parameter
in the boxes next to the sliders.
to adjust the brightness, contrast, hue,
and saturation levels of the image manually. Use the sliders in the menu
box to adjust the values or enter the numerical values for each parameter
in the boxes next to the sliders.
Click Color
Balance
![]() to adjust the color balance manually. Drag
the sliders to adjust the Cyan - Red,
Magenta - Green, and Yellow
-Blue levels. Click Highlights
to apply these color settings to emphasize the brighter areas. Click Midtones to apply these color settings
to the entire image with average intensity. Click Shadows
to apply these color settings to emphasize the darker areas in the image.
to adjust the color balance manually. Drag
the sliders to adjust the Cyan - Red,
Magenta - Green, and Yellow
-Blue levels. Click Highlights
to apply these color settings to emphasize the brighter areas. Click Midtones to apply these color settings
to the entire image with average intensity. Click Shadows
to apply these color settings to emphasize the darker areas in the image.

Next, the auto-fitting dialog box pops up. Click and move the blinking
indicators numbered 1, 2, 3, and 4 on the image to provide the four points
for the fitting process as displayed in the sample image.

Adjust the four points as close to the correct position as possible to get the best fit for the eyes and mouth features.

Click Face Profile Style
![]() to assign a profile style and a
standby motion to the model.
Select a desired profile from the template list that suits your model in the image.
to assign a profile style and a
standby motion to the model.
Select a desired profile from the template list that suits your model in the image.

Profile Strength: Drag the slider to adjust the weight of the profile as the model moves.
Motion Strength: Drag the slider to adjust the intensity of the head movement.
Standby Motion: Check the box and select a standby motion style from the drop down list. Select Custom in the bottom of the list to load a motion clip as your character's standby motion.

Click Background
Mask Editing
![]() to modify the area of the image that
does not get moved. The background mask, also known as the alpha channel,
controls the transparency of TGA or PNG images.
to modify the area of the image that
does not get moved. The background mask, also known as the alpha channel,
controls the transparency of TGA or PNG images.

Click Full
![]() to extend the background mask over the complete image area.
to extend the background mask over the complete image area.
Click Clear
![]() to delete the background mask.
to delete the background mask.
Click Inverse
![]() to invert the background mask area. The area that was previously
selected as the background mask is now used for animation
whereas the previously animated area is converted into the background
mask area.
to invert the background mask area. The area that was previously
selected as the background mask is now used for animation
whereas the previously animated area is converted into the background
mask area.
Use the Brush Tool to specify whether you want to
increase or decrease the background area. Click Increase
![]() if you want to enlarge the background
area or add more parts to it. Click Decrease
if you want to enlarge the background
area or add more parts to it. Click Decrease
![]() to erase parts of the background mask.
to erase parts of the background mask.
Adjust the Brush Size slider to increase or decrease the size of the brush tool.
Click Mask Color to specify the color for the background mask using the color palette.
Move the Opacity slider bar to specify the opacity of the background mask.
Move the Contract/Expand slider bar to contract or expand the background mask.
Move the Blur slider bar to blur the background mask.
Click Preview
![]() to view the results of your editing.
to view the results of your editing.
|
Note:
|
Wire Frame Mode:
CrazyTalk automatically generates the wire frame surrounding the face
according to the 4 points you set in the Auto-Fit Anchor Points panel.
You may click Basic Facial Mode
 or Detailed Facial Mode
 to view the wire frame. You may drag the control points or the lines to
fit the character’s face much more precisely
to view the wire frame. You may drag the control points or the lines to
fit the character’s face much more precisely
|
|
|
|
Basic Facial Mode |
Detailed Facial Mode |
The wire frame structure is smoother than the one in previous version of CrazyTalk, which will create a more realistic movement and reducing the face-breaking phenomena when the character moves.
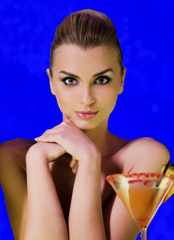
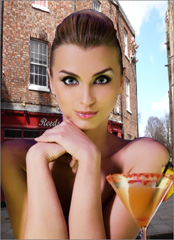
Click Background and Camera Movement  to specify a solid color or an image as the
background.
to specify a solid color or an image as the
background.
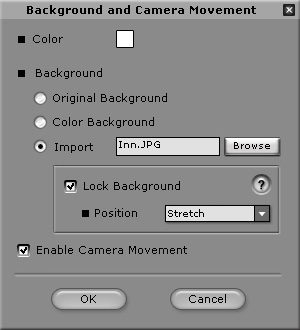
Color: Click to specify a solid color as the background.
Background:
Original Background: Use the background of the original image.
Color Background: Select this button to enable the solid color specified in previous step.
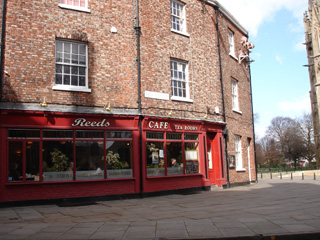
Import: Browse to your desired image and apply it as the background of your project. You may also specify the position of the image in the background.
Lock Background: Check this box so that your background image remains still as the camera moves. Check off the box to have the background image follow the camera movements.
Enable Camera Movement: Check this box so you may add camera keys in the Head/Camera track in the timeline mode of the Script page.
|
|
|
|
|
|