| |
|
|
| |
How to Use the Flap Dummy? |
|
| |
|
|
| |
| |
Introduction of the Flap Dummy |
|
|
| |
| |
A. |
Turn on the Flap Dummy. |
| |
B. |
Change the speed of the flaps. |
| |
C. |
Change the distance between the wings. |
| |
D. |
Structure of the Flap Dummy. |
| For more details, please follow the step-by-step instructions below. |
|
|
| |
| |
A.Turn on Flap Dummy.
You can use any Assembled wing directly, because they are made up of Flap Dummy.
|
|
|
| |
|
|
| |
| |
B.Change the speed of the flaps
You can change the speed of the flap in the Timeline. |
|
|
| |
| B-1 |
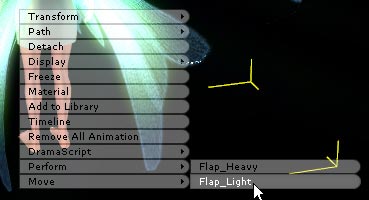
Follow A-2.''Right-click to select Perform/Flap Light'', and generate the flap animation clip. |
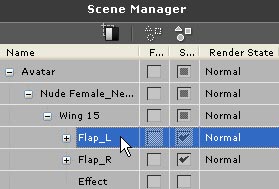
| B-2 |
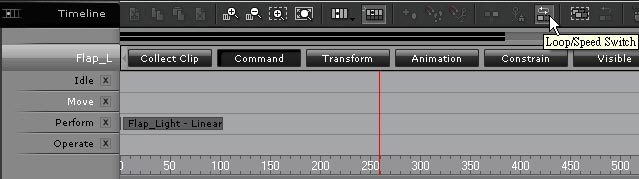
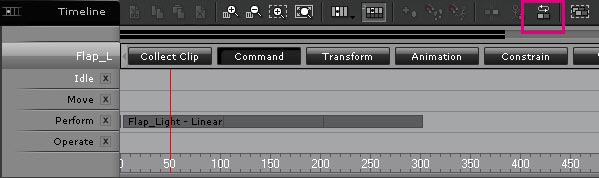
Select Flap_L in the Scene Manager, and open the Timeline. Make sure that Loop/Speed Switch is not checked. |
| |
|
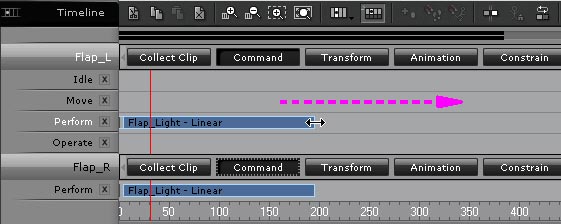
| B-3 |
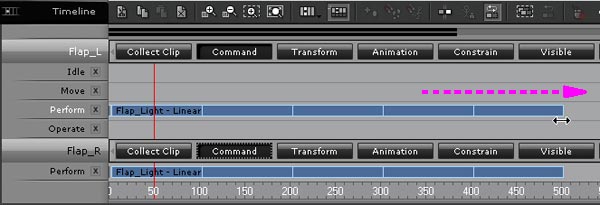
Select the Animation Clip in the Perform Channel, and drag it. |
| |
 |
|
Flap_L & R are connected to each other, so you only need to operate one to finish the flap editing. |
|
| B-4 |
The speed of the flap is now changed!
If you want to loop the animation, please follow Step.A. |
|
|
| |
| |
C.Change the distance between the wings.
|
|
|
| |
| C-1 |
Apply any Avatar, and Apply an Assembled Wing in Actor/Accessories. |
| C-2 |
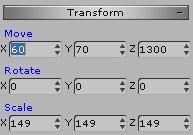
Select Flap_L/R in Scene Manager, and move Flap_L/R to where you want via Transform. |
| |
|
| C-3 |
You can follow Step.A to see the result after changing the distance between the wing. |
|
|
| |
| |
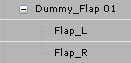
D.Structure of the Flap Dummy.
|
|
|
| |
| |
All Assembled wings are made up by Flap Dummy. You can see the Structure of the Flap Dummy as below. |
| |
 |
| |
In order to assemble your own wing, please follow the step-by-step instructions below. |
| D-1 |
Apply and move segments, and select all attach to Flap Dummy. |
| D-2 |
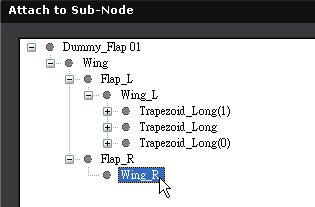
Select segment that will be the right-side in Scene Manager. |
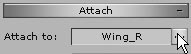
| D-3 |
Click on the Attach to in Modify to open Attach to Sub-Node. |
| |
|
| |
 |
|
Attach the Segments that will be on the right-side to Wing_R
Attach the Segments that will be on the left-side to Wing_L |
|
|
|